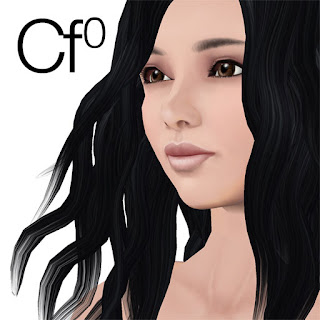
Photo credits: Hair by Kin Keiko, Eyes by Toast Bard Single light eyeliner & blush light-pink skin without freckles. Minor differences/changes from previous skin (Lfº):
- Lighter, more pinkish skintone
- Eyelid creases are lighter and closer to the eyelid edge
- Eyebrows are thicker in area, but less dense
- Lips are slighty less pouty
Ready-to-wear skin in Suffugium. PSDs on MediaFire.
P.S. if you're a Photoshop Ninja, you could fairly easily combine features from this skin with any of the previous skins (although changing the overall skintone might require more work--I'm planning on making some kinda tutorial for this soon) ^^

waiting for ur tutorials, i made my first customization from ur PSDs:
http://vallegiulia.wordpress.com/2008/01/05/undead-skin-freebie-skin/
thanx eloh!
kisses
vg:*
I would love a tutorial please. I'm hoping to make myself a coloured "fae" skin and your tutorial would be invaluable.
please please please
hugs & kisses
Faerie
This is so great Eloh, I'm a total virgin when it comes to creating skins/clothes. I can't wait to start experimenting.
Thanks so much :D
Making human skin is so difficult... color seems to change when it is uploaded and the amount of contrast used for shadow of muscles is difficult to determine to avoide a line/tattoo look.
Hmm and the face it a whole different issue!!!
I love it! Thank you!
Faerie - open a copy of the lightest skin in the GIMP (or photoshop) and find the solid-colored base layer. Use the sliders on the "color balance tool" to adjust the tone of the base layer to green or blue or whatever you want.
Then, one by one through all 28 layers, adjust the shading layers into the same range. You will have to adjust some layers in the highlights and some in the shadow (click the button). Take notes on which settings you used because you have to adjust the other two pieces to match.
I'm making a better-looking water nymbh in blues and greens with this method. It's complex!
The more I look at these, the more I understand why skins cost a bazillion lindens.
OH. You can get a decent looking skin for a slender man or a boy if you just remove most of the breast shading and eye makeup.
As far as changing skin tone goes, I'm planning to use the little-known Photoshop 'Gradient Map' function I've heard of. I'll be sure and post results.
Colour modification:
Gimp:
1] Filters -> Colors -> color to alpha
(and then use the SL sliders to set base skin tone)
OR
2] Filters -> colors -> map -> sample colorize.
(you need two images open, the skin, and an image you wish to pull the color range from)
Post a Comment